环境配置
1、conda
1
2
3
4
5
6
7
8
| # 新建环境
conda create -n <自定义一个名字> python=<想要使用的版本>
# 进入环境
# win
conda activate <环境名字>
# linux
source activate <环境名字>
|
如果忘记自己有什么环境了怎么办?
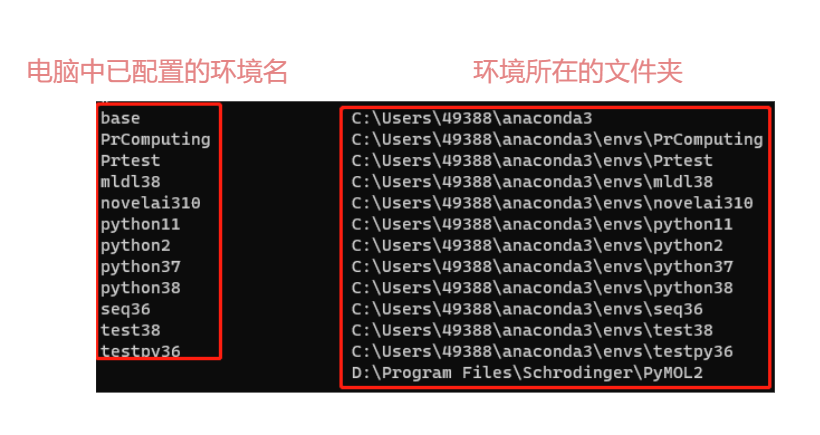
2、安装库
为python安装库有两种方法
pip安装库
在本地环境中通常使用pip进行库安装
1
2
3
4
5
| # -i 为更换源,可以提高pip下载速度,可以不使用
pip install <库的名字> -i https://pypi.tuna.tsinghua.edu.cn/simple
# 需要指定版本的时候
pip install <库的名字>==<指定版本信息> -i https://pypi.tuna.tsinghua.edu.cn/simple
|
conda安装库
当我们在conda中创建环境后,可以使用pip安装,但通常使用conda进行安装
1
2
| conda install <库的名字>
# 当需要指定版本的时候,方法与pip相同
|
具体操作
在本次需要执行的py文件中需要安装以下几个库
- scikit learn
- pandas
- numpy
- scipy
- xgboost
- lightgbm
具体的安装方法如下
1
2
3
4
5
6
7
8
9
10
11
12
| conda install scikit-learn numpy pandas scipy xgboost lightgbm
# 也可以分开写
conda install scikit-learn
conda install numpy
conda install pandas
conda install scipy
conda install xgboost
conda install lightgbm
# 完成安装后我建议先升级一次scipy,避免出现不兼容的问题
conda update scipy
|
校园网可能会出现conda连不上服务器的情况,这个时候可以使用pip来安装
当然能用conda最好用conda,但是我最近conda总是连不上服务器
1
2
3
4
5
| # -i 是为了下载更快
pip install scikit-learn numpy pandas scipy xgboost lightgbm -i https://pypi.tuna.tsinghua.edu.cn/simple
# scipy更新
pip install --upgrade scipy
|
使用
1
2
3
4
5
6
| # 进入conda环境
conda activate <环境名>
# 运行
python <py文件名> <文件夹路径>
|